In the first part of this series of articles, a local Git repository was created for a website project. In the second part, we build on this and create a remote repository on Github.
How to create a remote repository on Github
Now that a local repository is available, we will now add a remote repository, using Github in this tutorial. For the following steps it is therefore necessary to have a Github account.
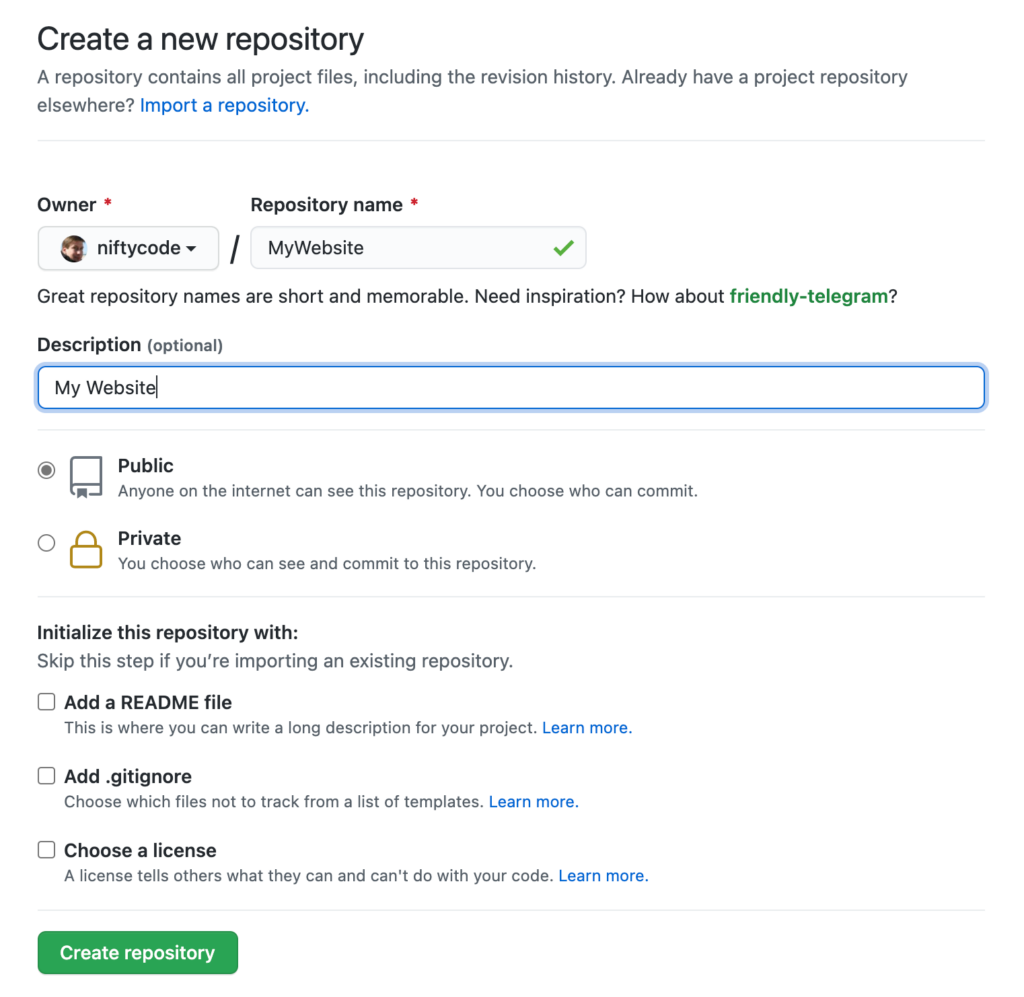
Go to the Github website and click on the “New” button. On the page that opens, enter a project name (in this case “MyWebsite”) and select “Public” or “Private”, which determines whether the repository should be visible to everyone or private. Optionally, a project description can be added. Here it is simply “My Website”.
A repository should have a Markdown file called “README.md”. This file contains a description of the project. Although I have not created a README file for this project, I am not checking this box because I want to show how this file can be added to the repository later.
It may also be useful to add a .gitignore file. This allows you to specify the directories and files that should not be transferred to the remote repository. If you select this option, you will see a dropdown menu where you must choose a programming language. Github will then create a .gitignore file with the files that should not be transferred. In this example, I am not adding a .gitignore file.
If your repository is “public”, you should definitely choose a license so that third parties know to what extent they can use your code. I am not adding a license here.
In the following image you can see my settings:

Click on “Create Repository”. Setup instructions will appear on the next page. If a Git application such as Github Desktop or Tower is installed on the operating system, I could complete the setup by clicking on “Setup in Desktop”. The corresponding program would then open. However, we have done all the work so far in the shell and we want to complete the setup in the shell. So we are interested in the following two options:
- „…or create a new repository on the command line“
- „…or push an existing repository from the command line“
The latter applies to our situation. There is already a local repository to which we now want to add a remote repository hosted on Github. So the three instructions shown there are of interest:
$ git remote add origin https://github.com/niftycode/MyWebsite.git
$ git branch -M main
$ git push -u origin main
In the shell, change to the project directory and execute these instructions one by one. After executing the push command, a summary similar to the following appears:
Enumerating objects: 12, done.
Counting objects: 100% (12/12), done.
Delta compression using up to 4 threads
Compressing objects: 100% (9/9), done.
Writing objects: 100% (12/12), 1.24 KiB | 1.24 MiB/s, done.
Total 12 (delta 2), reused 0 (delta 0), pack-reused 0
remote: Resolving deltas: 100% (2/2), done.
To https://github.com/niftycode/MyWebsite.git
 * [new branch]      main -> main
Branch 'main' set up to track remote branch 'main' from 'origin'.
If these steps have never been performed before, you will be asked for your Github login details, which must be entered in the shell. Otherwise, the push command will not be executed. A personal access token must be used instead of the Github password. This token can be generated on Github in the “Settings” section:
> Settings > Developer Settings > Personal access tokensFor more information on this topic, see the Github help.
Add a new file
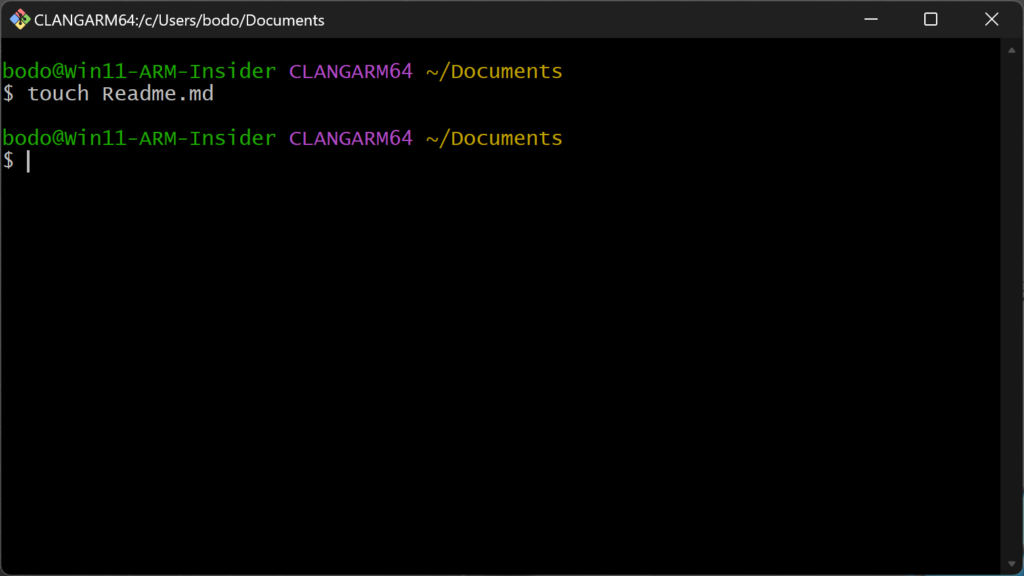
Our project is now missing the files “.gitignore” and “README.md”. The latter should definitely be there, while “.gitignore” is not needed for now. On UNIX-like systems, you can open the project directory in the terminal and use the touch command:
$ touch README.mdOn Windows, Git Bash is available to you by installing Git.

This process creates an empty file with the appropriate name. Alternatively, you can open a text editor and save a file called “README.md” in the project directory, which now looks like this:
<Project Name>
  |
  |--.git
  |--README.md
  |--index.html
However, the README.md file has not yet been added to the local repository. It should also be added to the remote repository, which is achieved by the git push command.
To add the README.md file to the local repository, run the following commands:
$ git add README.md
$ git commit -m "add README"
[main 6354581] add README
 1 file changed, 0 insertions(+), 0 deletions(-)
 create mode 100644 README.md
The push command is then used to commit the changes to the remote repository:
$ git push
Enumerating objects: 4, done.
Counting objects: 100% (4/4), done.
Delta compression using up to 4 threads
Compressing objects: 100% (2/2), done.
Writing objects: 100% (3/3), 327 bytes | 327.00 KiB/s, done.
Total 3 (delta 0), reused 0 (delta 0), pack-reused 0
To https://github.com/niftycode/MyWebsite.git
   13b8ebf..6354581  main -> main
If you now open the project page on Github in your browser, the added “README.md” file should be displayed there.
If your repository is public, other users can now clone it. To do this, they must use the clone command:
$ git clone https://github.com/<username>/<repository>.gitThis brings us to the end of this little tutorial. You now know how to create a local and a remote repository.
Learn Version Control with Git
If you would like to learn Version Control with Git, you are welcome to contribute to my project small-python-projects. You can find more information in the file Contributing.md.
git clone https://github.com/niftycode/small-python-projects.gitLast updated on December 21st, 2024