Introduction
What does a virtual development environment do? It isolates different Python versions and their package installations from each other. Once set up for a Python project, this means that the packages used are only available to this project. Updating one of these packages does not affect other packages installed on the system. In addition, different Python versions can be installed and used for different projects.
Not installing packages globally has another advantage: it protects the integrity of the operating system. Package conflicts that can occur during a system-wide installation are also avoided.
virtualenv and venv
A virtual environment in Python can be created in different ways. In order to use a virtual development environment, it was previously necessary to install the virtualenv package. Since version 3.4, this is no longer necessary because parts of this package have been implemented in Python as a module named venv. Using venv has been the recommended way to set up a virtual environment since version 3.5. Therefore, the setup is explained below using this module. I also show how to use or activate a virtual environment in the Terminal.
Set up a virtual environment
After a new project has been set up, the virtual environment can already be added. Let’s look at this with the following example. Assuming the Python project is named “my-project”, then the project structure could look like this:
└── my-project
    ├── README.md
    ├── docs
    ├── my_project
    │   ├── __init__.py
    │   └── main.py
    ├── pytest.ini
    ├── requirements.txt
    ├── setup.py
    └── tests
└── __init__.pyTo set up a virtual environment, you have to be in the project directory:
$ cd <my-project>PS> cd <my-project>The virtual environment is now created with the following commands:
$ python3 -m venv venv # Linux, macOSPS> python -m venv venv # WindowsOn Windows, py can be used instead of python:
PS> py -m venv venvNote: If on Windows the path to the Python installation has not been added to the PATH environment variable, the full path must be used to create a virtual environment.
Executing the statement causes a new directory to be created that is called venv in this example. The name can be chosen freely, but it is common among Python developers to use “venv” (or “.venv”). Development environments also adhere to this unwritten rule (e.g. PyCharm).
On Linux systems and macOS, a period is often placed in front of the name:
$ python3 -m venv .venvAs a result, “.venv” becomes a hidden folder. This folder does not appear in the File Manager. Since the commonly used programs PyCharm and Visual Studio Code use “.venv” by default, it is recommended to use this name.
The directory structure now looks like this, with “.venv” selected as the folder name:
└── my-project
    ├── .venv
    │   ├── bin
    │   ├── include
    │   ├── lib
    │   └── pyvenv.cfg
    ├── README.md
    ├── docs
    ├── my_project
    │   ├── __init__.py
    │   └── main.py
    ├── pytest.ini
    ├── requirements.txt
    ├── setup.py
    └── tests
└── __init__.pyActivate or deactivate the virtual environment
Before packages can be installed, the virtual environment must be activated. You can do this using the following commands:
Linux and macOS:
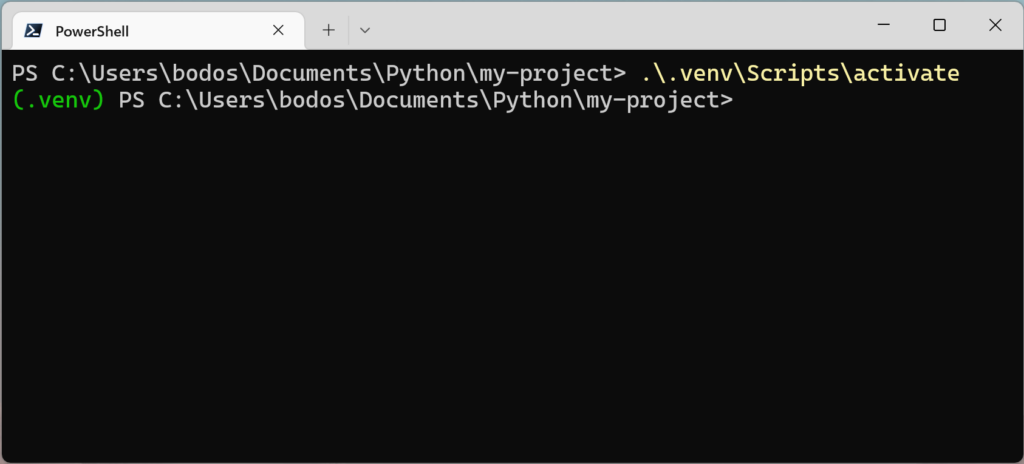
$ source .venv/bin/activateWindows:
PS> .venv\Scripts\activateAfter activation, the command prompt shows (.venv) at the beginning of the line.
Now pip or pip3 can be used to install packages:
$ pip3 install <Paketname> # Linux, macOSPS> pip install <Paketname> # WindowsThese packages are not installed globally, but are only available in the virtual environment. So they are only available to this Python project.
The virtual environment is deactivated on all operating systems with the deactivate command.
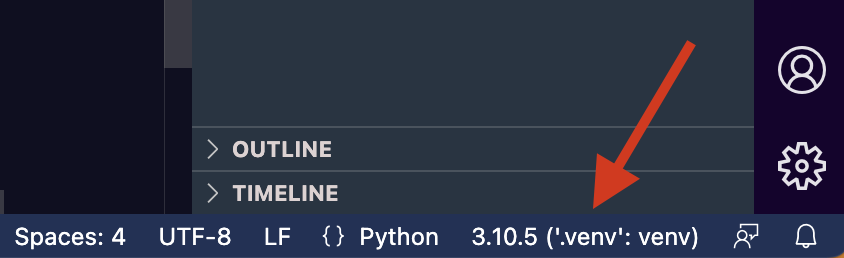
Development environments
A virtual environment created in the terminal is automatically recognized by development environments (PyCharm, Visual Studio Code, etc.). In general, this is always the case if “.venv” or “venv” is used as the directory name. If the virtual environment has been recognized, then there is no need to activate it. This should already be done by the development environment. Incidentally, this can be checked in the status bar of the respective application. For example, it says “(.venv)”. In some programs, the Python interpreter used is also displayed.