The Tkinter library is available in Python for creating a graphical user interface. In addition, the CustomTkinter UI library is a modern variant that allows more customization in terms of appearance. This article shows how CustomTkinter can be used to create a window with two text fields (entries), a button widget and a label widget. An object-oriented approach is used, i.e. a class with the name MainWindow is created.
Add the import instruction for CustomTkinter at the beginning of this small program:
import customtkinter as ctkIn the next step, we start with the implementation of the class:
class MainWindow:

def __init__(self):
    pass
In the __init__ method, an instance of a CustomTkinter window is first created. This window contains the title “Custom Tkinter Window”:
# Initialize the main window
self.window = ctk.CTk()

# Set the title of the window
self.window.title("Custom Tkinter Window")
CustomTkinter allows more design options for the widgets, for example in terms of color or font. In this example, the appearance and color scheme are defined:
# Set the appearance mode to "dark" and the default color theme to "blue"
ctk.set_appearance_mode("system")
ctk.set_default_color_theme("green")
Here, “system” means that the appearance used by the operating system should be used (light or dark mode). Alternatively, “light” or “dark” could be specified here.
The rest of the code corresponds to the code in my previous Tkinter examples with the difference that, for example, ctk.CTkLabel must be used instead of tk.Label when creating the widgets. The widgets for this project are therefore created as follows:
# Entry
self.first_input_field = ctk.CTkEntry(self.window)
self.second_input_field = ctk.CTkEntry(self.window)

# Button
self.calculate_button = ctk.CTkButton(
    self.window, text="Calculate", command=self.calculate
)

# Label
self.result_label = ctk.CTkLabel(self.window, text="Result label")
Using the grid layout manager, the complete code looks like this, where I have not added any logic for the calculation in the calculate() method.
# Import the required libraries
import customtkinter as ctk


class MainWindow:
    def __init__(self):

        # Initialize the main window
        self.window = ctk.CTk()
        # Set the title of the window
        self.window.title("Custom Tkinter Window")

        # Set the appearance mode to "dark" and the default color theme to "blue"
        ctk.set_appearance_mode("system")
        ctk.set_default_color_theme("green")

        # Set width and height of the window
        self.window.minsize(400, 200)
        self.window.maxsize(600, 400)
        window_width = 400
        window_height = 200

        # Get the screen dimension
        screen_width = self.window.winfo_screenwidth()
        screen_height = self.window.winfo_screenheight()

        # Find the center point
        center_x = int(screen_width / 2 - window_width / 2)
        center_y = int(screen_height / 2 - window_height / 2)

        # Set the position of the window to the center of the screen
        self.window.geometry(f"{window_width}x{window_height}+{center_x}+{center_y}")

        # Window is not resizable
        self.window.resizable(True, True)

        # Entry
        self.first_input_field = ctk.CTkEntry(self.window)
        self.second_input_field = ctk.CTkEntry(self.window)

        # Button
        self.calculate_button = ctk.CTkButton(
            self.window, text="Calculate", command=self.calculate
        )

        # Label
        self.result_label = ctk.CTkLabel(self.window, text="Result label")

        # Configure the main window
        self.window.grid_rowconfigure(2, weight=1)
        self.window.grid_columnconfigure((0, 1), weight=1)

        # Add entries to the content frame
        self.first_input_field.grid(column=0, row=0, padx=10, pady=(10, 5), sticky="ew")
        self.second_input_field.grid(
            column=1, row=0, padx=10, pady=(10, 5), sticky="ew"
        )

        # Add button
        self.calculate_button.grid(
            row=1, column=0, columnspan=2, padx=10, pady=5, sticky="ew"
        )

        # Add label
        self.result_label.grid(
            row=2, column=0, columnspan=2, padx=10, pady=(5, 10), sticky="ew"
        )

    def calculate(self):
        pass

    def mainloop(self):
        self.window.mainloop()


if __name__ == "__main__":
    app_instance = MainWindow()
    app_instance.mainloop()
This window is displayed after the code has been executed:
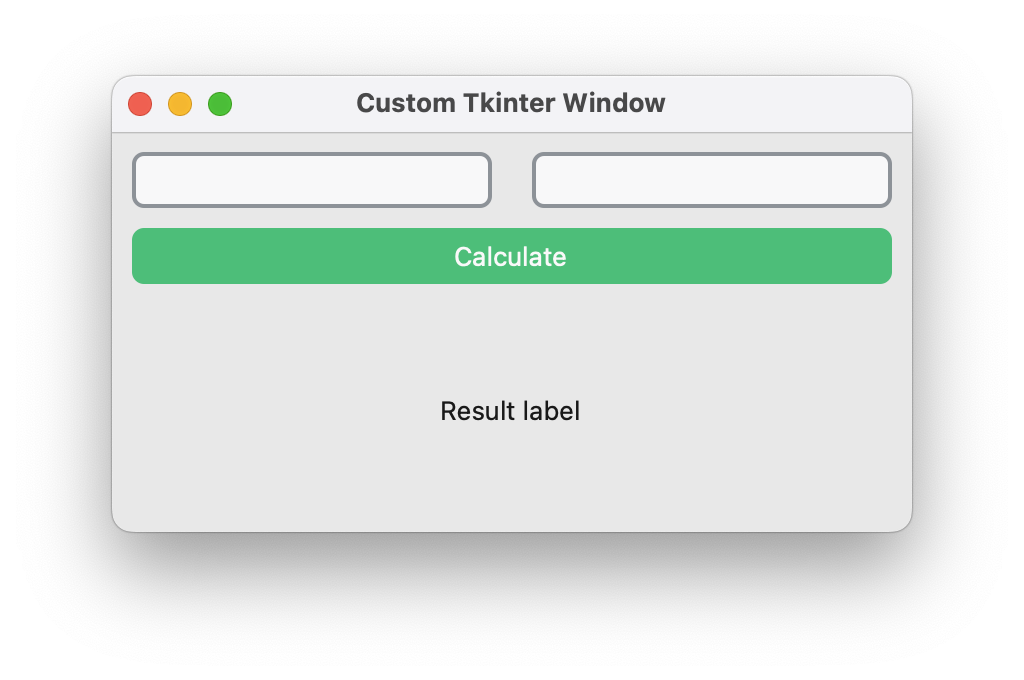
CustomTkinter opens up many more possibilities. You should definitely take a look at the documentation. Developer Tom Schimansky has also published a tutorial on the project’s home page.